
How to Desaturate in Photoshop CC
Desaturation is the process of removing color or making colors less vivid in an image. It can be a helpful tool in Adobe Photoshop for achieving various effects in photo editing. Use it for highlighting a specific color, creating black and white images, or toning your images.
We'll cover a few different ways to desaturate in Photoshop and how to work creatively with desaturation to achieve various effects.
Get my eBook: 25 Techniques all Photographers Should Master - for Free
How To Desaturate In Photoshop Using The Desaturate Command
The easiest way to desaturate an image in photoshop is to use the desaturation command. To do this, go to Image >Adjustments > Desaturate. This will automatically desaturate your image, essentially turning it into a black and white image.
Note: There is a better way to create black and white photos in Photoshop using gradient maps.
Using The Desaturate Keyboard Shortcut
Instead of using the menus, you can also use Photoshop's Desaturate shortcut keys:
Shift + Cmd + U (Mac)
Shift + Ctrl + U (Win)
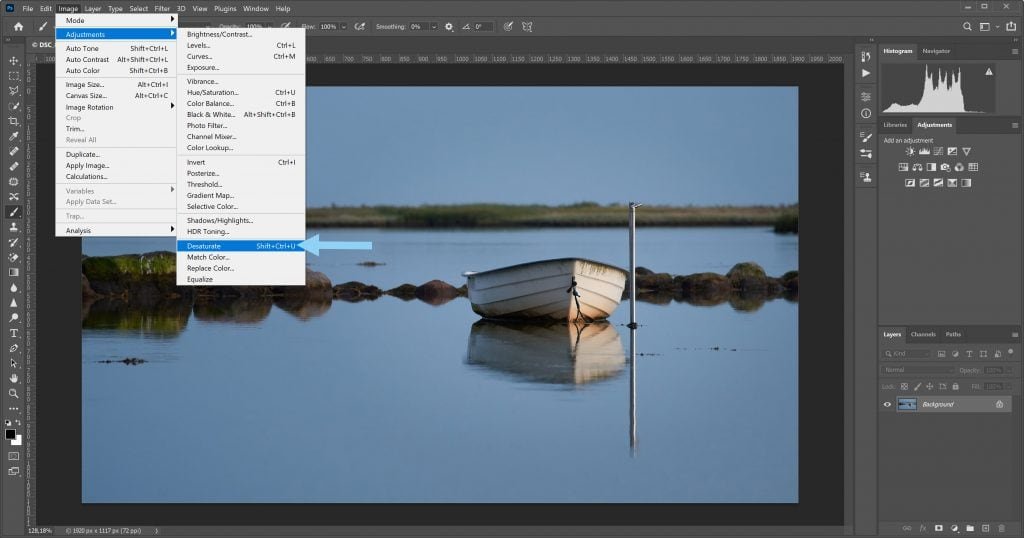
desaturating in Photoshop using menus
Desaturate using the menu.

fully desaturated
Image After Applying Desaturation Command (Fully desaturated)
Note: This method is destructive. This means that you cannot go back to a full-color version of your image. Instead, be sure to create a copy by duplicating the background layer and applying the changes to the copy layer.
How To Desaturate a Layer In Photoshop Using Hue / Saturation Adjustments
Most photographers choose to desaturate their photos using a hue/saturation adjustments layer. This is because it allows greater control over the level of desaturation and how each color is affected.
To Apply a Hue/Saturation Adjustment Layer:
Go to the adjustments panel in your right toolbar (if you can't see this, go to Window > Adjustments).
In the adjustments panel, select the hue/saturation adjustment.
Selecting this will open the hue/saturation adjustment panel, where you can adjust hue, saturation, and lightness using sliders.
Adjusting the hue slider will adjust the color of the image and produce a variety of different effects. Likewise, the lightness slider will change how dark or bright the image appears.

desaturate using an HSL layer
Adjusting using the Hue/Saturation Panel
The slider we want to focus on is the saturation slider.
Pushing the saturation slider all the way to the left will fully desaturate your image. Pushing the slider all the way to the right will increase the saturation.
By adjusting the slider, you can achieve the exact level of desaturation you're looking for. You may also want to adjust the hue and lightness sliders to highlight a specific color in your image.

Selective Desaturation In Photoshop
Selective desaturation is an easy way to bring attention to a specific part of your photo. In this method, you only apply desaturation to those parts by using a layer mask.
Layer masks are a great, non-destructive way to apply changes to specific parts of your photo. You can use it for both large or small areas of your photo.
Step 1: Create a Selection of what you want to Desaturate
You can use any selection tools or the quick mask tool for this.

background selected
Selecting everything except the boat
Step 2: Create an HSL Adjustment Layer Based on the Selection
With the selection active, click on the HSL Adjustment layer.

mask based on selection
Masked HSL layer in the Layers Panel

selective desaturation in Photoshop
Hue / Saturation adjustment was applied, with a layer mask.
Related Photoshop Articles:
Final Thoughts
Desaturating is a useful tool for producing a variety of different effects and helping your photos to pop. Hopefully, you've gained a good grasp on how to utilize desaturation in your photography.